(Image via
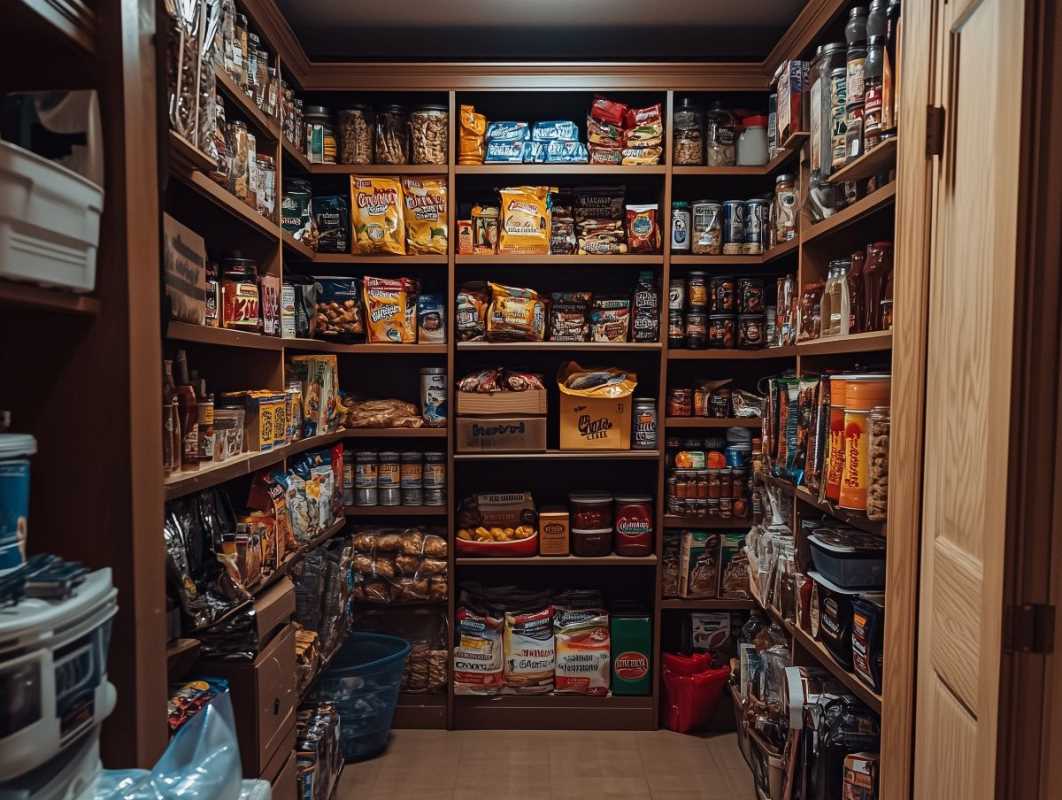
A well-organized pantry is the heart of an efficient kitchen. It saves you time when you are looking for ingredients and helps you keep track of what you have, reducing food waste and saving money on groceries. While professional organizing systems can be expensive, you can achieve a beautifully functional pantry with a few creative and practical do-it-yourself ideas.
This guide offers reliable and budget-friendly DIY solutions to transform your pantry from chaotic to calm. We will explore how to repurpose everyday items, create custom storage, and make the most of every inch of your space. These projects are straightforward and deliver results you can trust.
1. Repurpose Household Items for Smart Storage
Before you buy new containers, look around your home for items that can be given a second life. Repurposing is not only cost-effective but also an environmentally friendly way to get organized.
- Glass Jars: Clean out old jam, pickle, or sauce jars to store dry goods like rice, lentils, nuts, and seeds. They are clear, so you can see what’s inside, and they create a uniform, classic look. Soaking the jars in hot, soapy water will help remove any stubborn labels.
- Shoe Organizers: An over-the-door shoe organizer is a fantastic tool for pantry storage. The clear pockets are perfect for holding small, grab-and-go snacks, spice packets, or kids' juice boxes. This frees up valuable shelf space and keeps small items from getting lost.
- Magazine Holders: Sturdy magazine files can be turned on their side to store items like onions, potatoes, or garlic. They allow for air circulation, which helps produce last longer. You can also use them upright to neatly file cutting boards, baking sheets, or aluminum foil and plastic wrap boxes.
2. Create Custom Labels for a Polished Look
Labeling is essential for a truly organized pantry. It helps everyone in the family find what they need and put things back in the right place. Creating your own labels adds a personal, high-end touch without the cost.
- Chalkboard Labels: You can buy adhesive chalkboard labels or use chalkboard paint on the lids or sides of your containers. This allows you to easily update the label with a chalk marker if the contents change.
- Handwritten Tags: For a rustic, farmhouse look, use simple cardstock tags. Punch a hole in the corner and tie them to baskets or jar lids with twine or ribbon. This is a simple but elegant solution.
- Printable Labels: There are many free, printable label templates available online. Find a design you like, customize it with your pantry items, and print it on adhesive paper. This creates a professional and cohesive look.
3. DIY Project: Build a Tiered Can Organizer
Canned goods can quickly become a jumbled mess, making it hard to see what you have. This simple DIY project creates tiered shelving, allowing you to see every can at a glance.
What You'll Need:
- A piece of scrap wood (like a 1x10 or 1x12 board)
- A saw
- Wood glue or screws
- A tape measure
Instructions:
- Measure Your Shelf: First, measure the depth and width of your pantry shelf to determine the size of your organizer.
- Cut Your Boards: Cut three pieces of wood. The first piece will be the base. The second piece should be the same length but slightly less deep. The third piece should be the same length but even less deep than the second. For example, if your shelf is 9 inches deep, you could cut your boards to be 9 inches, 6 inches, and 3 inches deep.
- Assemble the Tiers: Stack the boards on top of each other, starting with the widest at the bottom and the narrowest at the top. Align them so their back edges are flush. This will create three "steps."
- Secure the Layers: Secure the boards together using wood glue. For extra stability, you can use screws. Let the glue dry completely.
- Place and Organize: Place your new tiered organizer on the shelf and arrange your cans. You will now be able to see every can, making it easy to find what you need.
4. DIY Project: Create Custom Storage Bins
Matching bins and baskets can be expensive. You can create your own stylish storage bins using simple cardboard boxes, which is a practical way to group similar items together.
What You'll Need:
- Sturdy cardboard boxes of various sizes
- Fabric, contact paper, or paint
- A hot glue gun or spray adhesive
- Scissors
Instructions:
- Prepare Your Boxes: Find sturdy boxes, like those from online deliveries. Cut off the top flaps to create an open-top bin.
- Cover the Boxes: Measure and cut your fabric or contact paper to fit around the outside of the box. If using fabric, wrap it tightly around the box and secure it with a hot glue gun. If using contact paper, peel off the backing and carefully smooth it onto the surface of the box. Alternatively, you can simply paint the boxes a uniform color.
- Add a Handle: For easy access, you can add a handle. Punch two holes in the front of the box and thread a piece of thick rope or twine through, knotting it on the inside to secure it.
- Label and Fill: Add a label to the front of your new bin and fill it with pantry items. These bins are perfect for corralling pasta boxes, bags of chips, or baking supplies.
5. Maximize Vertical and Unused Space
In any pantry, especially a small one, it is crucial to use every available bit of space. Look for overlooked areas where you can add storage.
- Under-Shelf Baskets: These wire baskets slide onto an existing shelf, instantly creating a new layer of storage underneath. They are perfect for holding bread, tortillas, or bags of produce without taking up more shelf space.
- Wall-Mounted Spice Rack: The inside of your pantry door is prime real estate. You can buy a simple wire rack or build your own using small, shallow pieces of wood. A door-mounted rack keeps your spices visible and frees up an entire shelf.
- Use Tension Rods: Tension rods are incredibly versatile. You can install one vertically to create dividers for cutting boards and platters. Or, install one horizontally to hang spray bottles by their triggers, clearing the floor or shelf space below.
Taking the time to organize your pantry is a practical investment in your daily routine. With these insightful and creative DIY ideas, you can create a system that is perfectly tailored to your needs and your budget. A well-ordered pantry not only makes cooking more enjoyable but also brings a sense of calm and control to your home.